




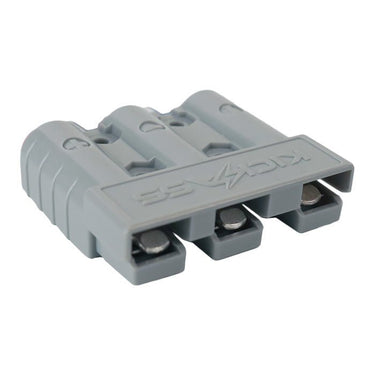


KickAss 3 Pin 50A Grey Anderson Style Connector
Score up to $350 back
Spend more during KickAss Week and get instant KickAss Credit toward your next purchase.
back Locked
back Locked
back Locked
back Locked
KickAss Credit is issued after your qualifying purchase. View terms
Pickup available at Acacia Ridge Store
Usually ready in 1 hour
1 Year Warranty
This product is covered by a 1 Year Limited Warranty.
Run your positive alternator, negative ground & ignition wires together in a single, durable connector. Fully insulated, rated to 50amps and made from strong polycarbonate.
SPECIFICATIONS
Technical Details
| Contact Rating | 50A |
| Contact Wire Size | 6 AWG |
| Voltage Rating | 600V (AC or DC) |
| Max Wire Insulation Diameter | 11mm |
| Contact Barrel Wire Size (AWG) | 6/10/12 AWG |
| Contact Retention Force | 22.7kg |
| Operating Temperature | -20°C to 105°C |
User Manual & Support Docs
| KickAss 3 Pin 50A Grey Anderson Style Connector |
Detailed Description
The new KickAss Three-Pin Anderson Style Connector simplifies connecting your DC-DC charger by allowing you to run your positive alternator, negative ground, and ignition wires in a single connector. It’s fully insulated, rated to 50 amps, and made from durable polycarbonate. The single-piece housing offers a cost-effective, safe, and long-lasting connection.
Includes:
- 4 Anderson terminals
- 3 terminals for 6 AWG wire
- 1 terminal for 10/12 AWG wire
Please Note:
Grey Anderson plugs are only interconnectable with Black and Grey Anderson plugs.
Installation Instructions
PLEASE ENSURE YOU UNDERSTAND THE INSTRUCTIONS PRIOR TO FITTING.
- Carefully strip back the cable sheathing using a stripping tool or Stanley knife (for twin-core cable).
- Strip 1 cm of insulation from each single-core cable (positive and negative) using a stripping tool.
- Attach the Anderson connector terminal lugs to the stripped cable ends and crimp them securely using a crimping tool.
- Confirm the terminal lugs are properly crimped by ensuring they cannot be pulled off.
- With the terminal lug lip facing up, insert the positive and negative cables into their designated slots on the Anderson plug (+ and -).
- Push cables through until the terminal lug lip latches over the internal spring clip and clicks into place.
- Verify each cable is secured by pulling gently—each should stay locked in place.
Note: To remove the cables from the Anderson plug once installed, use a small flathead screwdriver to press down the spring clip while pulling the cable out from the back of the plug.


