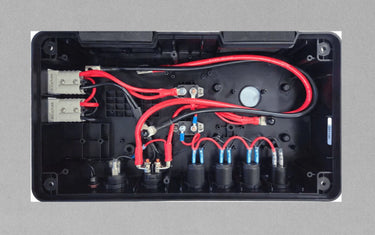
When setting up a 12V system, choosing the correct wire gauge is crucial. Whether you’re wiring up the appliances in your caravan, connecting a dual battery in your vehicle, or recharging power tools on your worksite, the thickness of your electrical wire affects the performance and safety of your system. In this blog, we’ll explain what wire gauge is and why it’s an important part of your 12V setup.
What is Wire Gauge?
When we’re talking about wire gauge, we’re referring to the thickness of the electrical wire. Thicker wires can carry more current with less resistance, and so are an important part of keeping your electrical systems running smoothly.
Why Wire Gauge Matters
1. Current Carrying Capacity
Current carrying capability is impacted by many elements, including the cable material (copper, tinned copper, aluminium etc), the outer insulation, and whether the cables are installed in free air or inside a conduit. Wire gauge also plays a part here. Using a wire that’s too thin for your system’s needs can lead to significant voltage drop across the cable, resulting in reduced performance of the connected device. In extreme cases, the cable can overheat and melt, so it’s important to check the specifications of the cable and make sure it’s suitable for your installation.
There are three main standards for measuring wire gauge: B&S, mm2, and AWG (American Wire Gauge). Here’s an overview of each:
- mm2 is a measurement of the cross-section of the wire conductor, measured in square millimetres (mm2). It gives a quick visual indication of the wire's size, however other elements such as the cable material should also be factored in when deciding whether the cable size is appropriate for specific applications.
- B&S stands for Brown & Sharpe, and is a standard gauge for cable sizes. The lower the number B&S, the thicker the cable. For example, an 8B&S cable is thicker than a 10B&S cable.
- AWG stands for American Wire Gauge, which is similar to B&S. Once again, the lower the AWG number, the thicker the cable, so a 10 AWG wire is thicker than a 12 AWG wire.
2. Voltage Drop
As electricity travels through a wire, it encounters resistance, causing a voltage drop. This drop can reduce the performance of your 12V devices. For instance, while a battery might show a voltage of 12.8V at its terminals, the voltage reaching the connected device could be just 12V due to drops across the cable.
Thicker wires have less resistance, which helps to minimise voltage drop and ensures that your devices receive the full voltage they need to operate effectively. For longer runs, especially in a 12V setup, using a thicker wire helps maintain performance and prevent power loss.
3. Safety
Choosing the correct wire gauge is crucial for safety. Under-sized wires can overheat and potentially cause electrical fires, while wires that are too large can be unnecessarily costly and bulky. Using an appropriate wire gauge ensures that your system operates safely within temperature limits and reduces the risk of electrical faults.
As an added safety precaution, you should also ensure that all cables are protected by some form of overcurrent or short circuit protection – this could be a fuse, a resettable circuit breaker, or integrated protective software.
Choosing the Right Wire Gauge for Your 12V Setup
When selecting wire gauge for your 12V system, consider:
- Current Rating: Match the wire gauge to the current requirements of your devices.
- Distance: Longer distances require thicker wires to account for voltage drop.
- Environmental Conditions: In harsh environments, ensure wires have suitable insulation and gauge for durability and safety.
In summary, understanding and selecting the right wire gauge is essential for maintaining efficiency, safety, and reliability in your 12V setup. By choosing the correct wire gauge, you ensure that your electrical system performs optimally and safely, giving you peace of mind on all your adventures.
KickAss have an extensive range of wiring kits and products, all of which are heavy duty and made of top quality materials to ensure minimal voltage drop. Browse our collection here to find everything you need to get your 12V setup wired up and ready for everything.


